Switching participants in BETA ensures accurate tracking of profiles for event participation. Whether managing individual or bulk updates, BETA offers flexibility to streamline this process.

Send and Save Invoices / Due Transactions
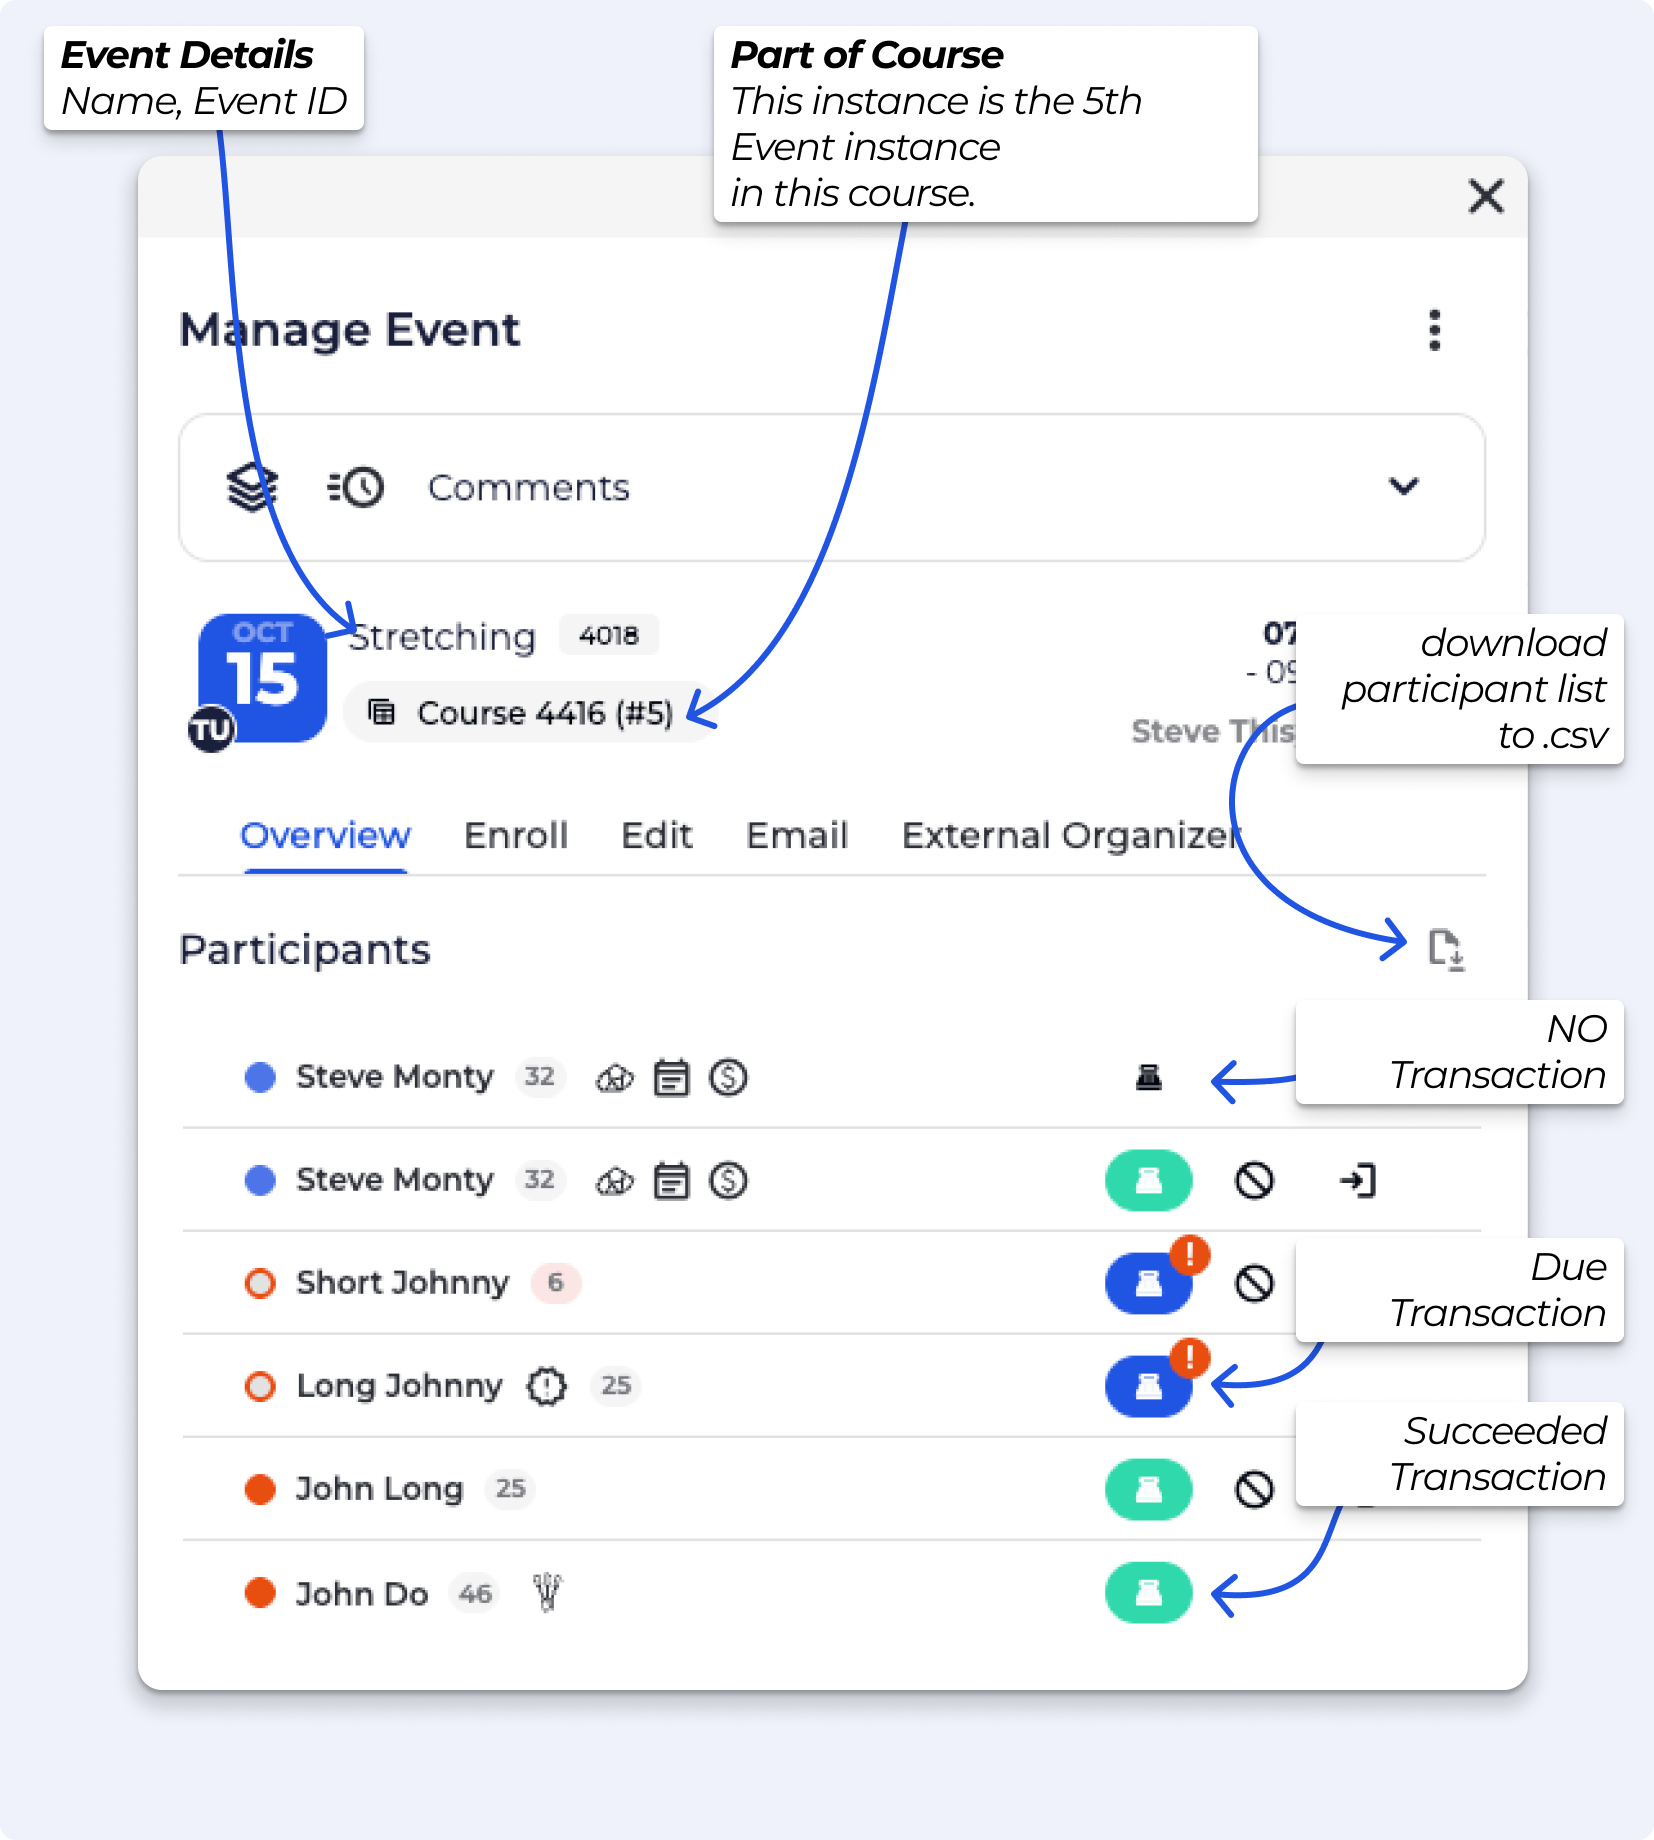
Manage part payments and issue passes/events for future payment through the POS system. Handle deposits and related transactions.
Enrolling into an instance means the participant is signed up for that single event only.

When you enrol in a course, the participant is automatically registered for every event instance within that course.

Setting a due transaction to the enrolment is a great way of indicating to your instructor, that the participant need to pay later.
When you create a payment for enrolled participants, the system first marks it as DUE, meaning it’s awaiting payment. You can then collect the payment directly from the calendar, streamlining the process.
It indicates that the payment is pending and has yet to be collected. Once the payment is received, the status will be updated to completed.
The flow if you wish to adjust a transaction value for an Event enrolment is a bit different - it must be processed through the POS.
 This video has sound
When you switch a participant to a different event instance or course, there is the option to send the newly enrolled participant an email notification. This helps keep participants informed about updated times, dates, or locations.
If enabled, the newly enrolled participant will receive the standard event confirmation email.
For below examples, we will switch the Participant, and not the time the participant is enrolled in.
External Organizer for the Organizer Widget
Learn how to change the external organizer for the Organizer Widget on event pages. Control profile access and ensure correct logins for seamless event management.
On the Profile Page, you can easily switch the participant from Person A to Person B within the same event. You can manage this for upcoming, missed & cancelled Event Attendance.
For Attended Events, you will need to undo their check in
📹🔗Manage Profile's Passes
This help article covers the management of passes on a visitor’s profile. Including transferring/gifting passes, changing their expiry date/start date, undoing a visit from a pass and more.
In the Participant List for an event, swapping Person A for Person B. From the Participant List, you can also do this for multiple individuals.
Within a course’s Participant List, you can replace Person A with Person B.
On the Profile Page, you can move Person A from an Event Instance, to another Event Instance.
On the Event Participant List, you can move Person A from an Event Instance, into another Event Instance. From the Participant List, you can also do this for multiple individuals.
On the Course Participant List, you can move Person A from a Course, into another Course. From the Participant List, you can also do this for multiple individuals.
If a participant has been enrolled into the wrong event or course, you can easily switch them to the correct one using the participant list - ⤷ Switching Event/Course
For events, simply move them from the incorrect event to the correct one.
For courses, make sure you're in the Manage Course pop-up before switching them to the correct course.
All linked booking forms, and participant details will also transfer with the booking after the switch - the transaction will show the newly issued event details (but the receipt and transaction details will not, this allows you to keep track of changes.
From the participant list of the original event, select the participant and choose to move them to another event (from a different template). This action will unenroll them from the original event and place them into the new one.
Their booking status, any linked booking form, and other info will remain linked.
When switching a participant from one course to another, make sure you are inside the Manage Course pop-up window—not just editing a single session.
From there, you can move the participant to another course based on a different template.
This option is useful when only specific participants need to be removed from an event without affecting others. It’s commonly used for handling individual cancellations, no-shows, or changes in registration.
Not by default. When removing or cancelling an individual participant, you can choose to send them an email using the cancellation popup. If an email is sent, any note added will be included as a personal message.
If a participant has been enrolled into the wrong event or course, you can easily switch them to the correct one using the participant list - ⤷ Switching Event/Course Important: If there is a price difference between the two, you’ll need to manually process a refund or additional charge—this won’t happen automatically.All linked booking forms, and participant details will also transfer with the booking after the switch - the transaction will show the newly issued event details (but the receipt and transaction details will not, this allows you to keep track of changes. For events, simply move them from the incorrect event to the correct one.For courses, make sure you're in the Manage Course pop-up before switching them to the correct course.
Yes!
The Email tab in an event instance allows you to manually send messages to all registered participants. It's a great tool for sharing updates, reminders, or last-minute changes. We recommend using it whenever you need to communicate directly with attendees outside of automated notifications.
Not by default. When removing or cancelling an individual participant, you can choose to send them an email using the cancellation popup. If an email is sent, any note added will be included as a personal message.
Not by default. When cancelling an event instance or course, you have the option to send an email to all registered participants via the cancellation popup. If you choose to send the email, any note you add will be included as a personal message in the email. The email is sent to the event organizer, with the participant(s) in BCC.